
 Log In
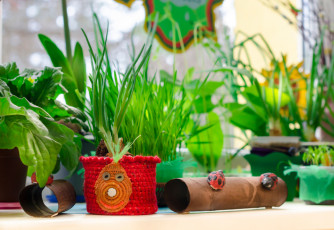
Environment
Growing greens on the sills + exercises of exploring
Now, when we get more and more daylight every day, every group can try and create their own little gardens on their sills. With the resulting products not only will they be able to make their meals more interesting, but also do a few exploration exercises.
What is necessary, to grow greens?
- Little containers (or bowls, deeper plates)
- Soil to grow the greens in
- Seeds that are not chemically enhanced (made for sprouting)
- Paper towels
- A sill, where a lot of daylight gets
- Spoons
Day of planting
On the day, when the planting of seeds is scheduled, the teacher with someone to help them prepares the work space – on the table there should be some sort of fabric, to make sure that cleaning up the soil is easier. In a bigger bowl you put in the soil (because it will be more challenging for children to take it out of a bag) and in the bag you put in spoons, that can be used as little shovels.
The process:
- Children fill the container with foil
- On the soil they carefully put seeds
- Seeds are covered with a damp paper towel and put in a warm place (not necessarily a sill at this point)
- Regularly have to be watered
- When after a few days you can see that the seeds have sprouted, take off the paper towel and put the containers on the sill in a bright place. They should be eatable in 4 to 9 days, depending on what kind of green that is.
Greens, that can be sprouted
- Radish leaves. Reddish sprouts taste exactly like reddish, maybe even a bit more intense. The best ways to eat them are fresh in salads, on bread, with cottage cheese, or add them to warm foods such as soups or stews.
- Peas. Usually used in salads. Pea sprouts can also be used as a supplement in tortillas or burgers.
- Arugula. With arugula you can compliment salads. The best foods to use it with are meat and cheese foods. It can also be added on pizza instead of peppers.
- Cressalates. They have an intense, peppery taste and can go in salads, potato meals, cottage cheese and omelette.
- Red cabbage. Tastes like cabbage, but also has a bit of spicy aftertaste. Fresh, juicy, ideally goes with salads, for example, carrot or cabbage sprouts. Can be used with soups or stews.
- Red leaf cabbage. The best goes with salads, cottage cheese, snacks or burgers. Just as reddishes, they taste good alone as well. Every one of these greens can also be used with fruit or vegetable cocktails.
Besides the greenery mentioned here, alfalfa, sunflower seeds, beans can be sprouted. Of course, you can also grow sypollochios.
Think of your own recipe!
When children have chosen their favorite seeds and have planted them, it is time to talk about the recipes they can be used in. Teachers can encourage children to introduce ideas, how they would want to eat the greens. Maye add to the soup they will have at lunch? Maybe put on bread? Maybe children want to prepare salads together, where they put in their greens. Children’s ideas can be fulfilled, depending on how realistic they are.
Taste the greens!
When the greens have sprouted, you can do degustations, because until now children probably won’t have had the opportunity to taste the different greens. It is completely normal, if they are cautious and a bit scared to taste something new. They can be encouraged to try just a tiny piece, with the possibility to spit it in a paper towel, if they don’t like it. Children can share observations, what tastes did they taste, if they have eaten anything similar before and how would they characterize the specific green.
Draw your own green!
When the greens have sprouted, every child can take their container and try to draw the greens. Children can observe different tones of green, the forms of the plans and the look they have and everything they have observed they can put on the paper. These paintings can not only be drawn, but also painted, created with application techniques.
Observe, how the greens grow!
An unusual task can be done with modern technologies. What is this task? Observe how the sprout is growing. And that can be done easily. Every phone camera has a time-lapse function. The idea is to film a long time period and see it in speed motion later on as a lot shorter video. For example, on a sunny day, when the growth will be a lot more active than usual, you can put the phone in a stable position next to the greens and film (it would be better to film one container, so that the details can be observed). Then you put on the time lapse function and leave it to record for the whole day. After that children will be able to see a video on a bigger screen of how their greens are growing.
Good luck!
Foto: Shutterstock.com